GoFAST: Additional modules
Introduction
The purpose of this document is to provide you with documentation on the use of the add-on modules offered by CEO-Vision.
Coupling Mail Management Module
Introduction
The purpose of this document is to provide you with documentation on the use of the add-on modules offered by CEO-Vision.
The Mail module is a new feature of GoFAST Collaborative GED designed to simplify mail management by centralizing documents (PDF, scanned documents, emails/attachments…) in dedicated collaborative spaces. This module improves visibility and traceability of mail and facilitates team processing with advanced features.
The Mail module provides complete management of mail life, from registration to delivery, receipt and sending. Users can effectively manage mail through collaborative features such as document template management, version management and history, as well as document comments. They can also edit and co-edit Office files in real time directly on the GoFAST platform.
The Mail module also offers advanced features to improve communication and visibility of current tasks. Users can keep track of mail status, processing times, and ongoing actions through summary activity notifications and workflow-related views, such as quick access to tasks, process dashboard, and notifications.
In short, GoFAST’s Mail module simplifies mail management and improves team collaboration by providing centralized document access and advanced tracking and notification capabilities. Learn more about the features available in the GoFAST Mail module.
Mails Management Module
The purpose of the mail module is to centralize mail (PDF, scanned documents, emails/attachments…) in collaborative spaces dedicated to mail and improve its processing management.
Thanks to the multi-location, mail is shared in both the Cross Collaborative Space and the Management Spaces with zero duplicates. Visibility can also be shared in private spaces if required.
Among the objectives of the Mail Management Module:
Centralize and automate mail management and associated replies, respecting access rights
Ensure that the steps of sorting and diffusion, reading, writing and validating responses are in accordance with a workflow
Have the necessary alerts to ensure proper consideration and timeliness
Find any mail with one or two keywords (e.g. subject, sender/recipient, date, etc.)
Collaborative spaces dedicated to mail management
The same principle on content management in GoFAST, mail management is dedicated to collaborative spaces:
A space of transversal group type “Mail Processing”, with two subgroups: one for classifying “incoming mail” and one for “outgoing mail”. Access to these transversal spaces is managed by the business managers in charge of mail management.
For each Collaborative Space reserved for a Directorate/Service, a subspace will be dedicated to managing incoming and outgoing mail.
Depending on the recipient or sender of a mail (Directions/Service), documents can be shared between the cross-sectional space dedicated to mail processing and the areas reserved for Directorates/Services: the same mail document will be visible in the right Collaborative Spaces, without duplication and with all the information, comments exchanged and version history.
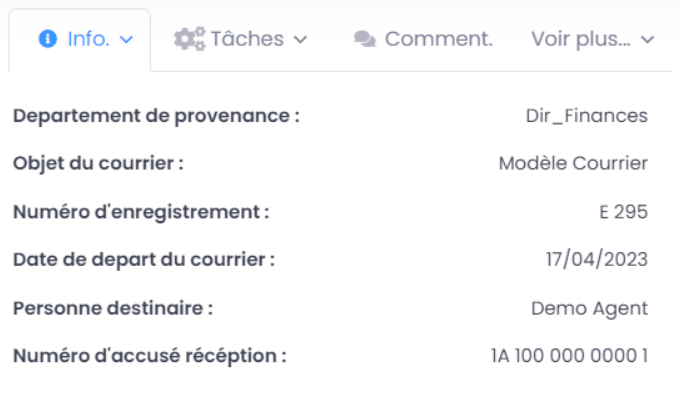
Mails metadata
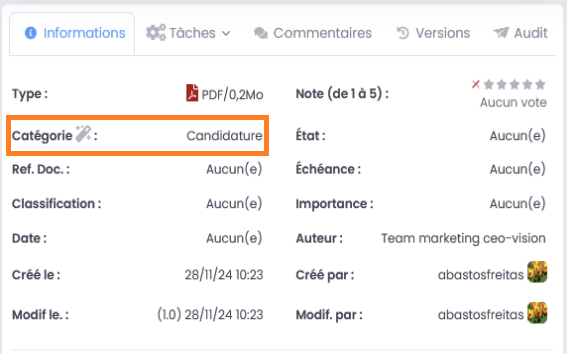
Once the document is processed by mail, it acquires additional metadata by going to the “Mail Information” tab
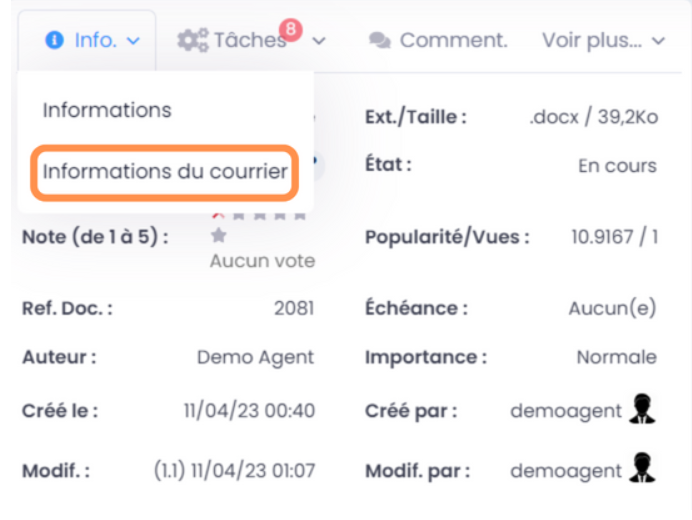
This metadata identifies the various important information related to mail as shown in the image below:
How to create a space dedicated to mail management?
No need to create a new space in GoFAST for mail processing.
Depending on your organization’s tree, you can mark the spaces that will be used to process mail as “Traitement des courriers” (Mail Management).
How to do ?
Open the space you want to mark as a space dealing with mail
Open the space you want to mark as a space dealing with mail
Validate the action
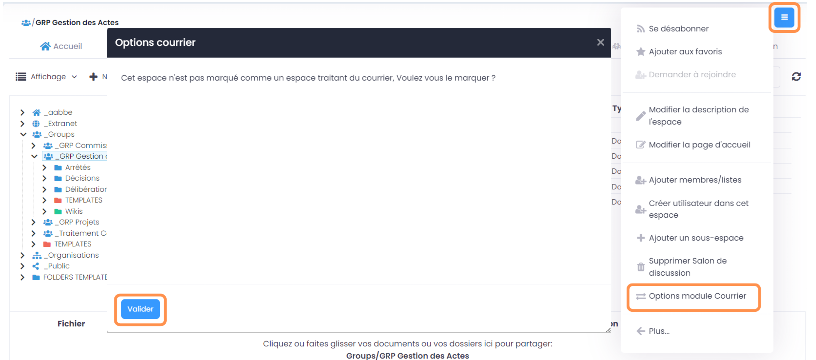
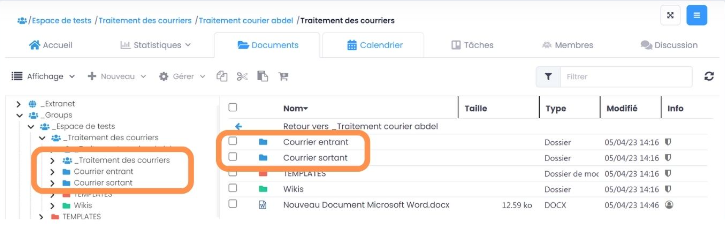
Upon validation, a subspace “Traitement des courriers” (Mail Management) is created with two folders “Courrier entrant” (Incoming Mail) and “Courrier sortant” (Outgoing mail) to classify mail respectively.
A User list “Traitement courrier ‘space name’” (Mail Management) is created in the “Members” tab by taking the members of the space as members.
Who can handle mail?
The users authorized to handle mail are the members of the “Mail Handling” list created automatically in each mail handling space.
How to handle incoming mail?
Stock incoming mail in GoFAST
Upon receipt of mail, which may be paper or digital, the mail manager must store it in GoFAST in order to initiate the processing process.
If GoFAST is paired with a scanning tool, scanned mail can be placed directly in the “To be processed” subdirectory of the “Incoming mail” directory.
Drop to the dedicated directory from the mailbox (email) via drag-and-drop.
Files added via drag-and-drop from the PC (network drive)
GoFAST offers 4 ways to start a process like the standard workflow:
From the top main bar, via quick access to “Processes and Tasks”
From the page of a document, via the “Processes and Tasks” button
From the documentary cart.
From the incoming mail space that triggers the workflow automatically
Start a process via the Quick Access Bar
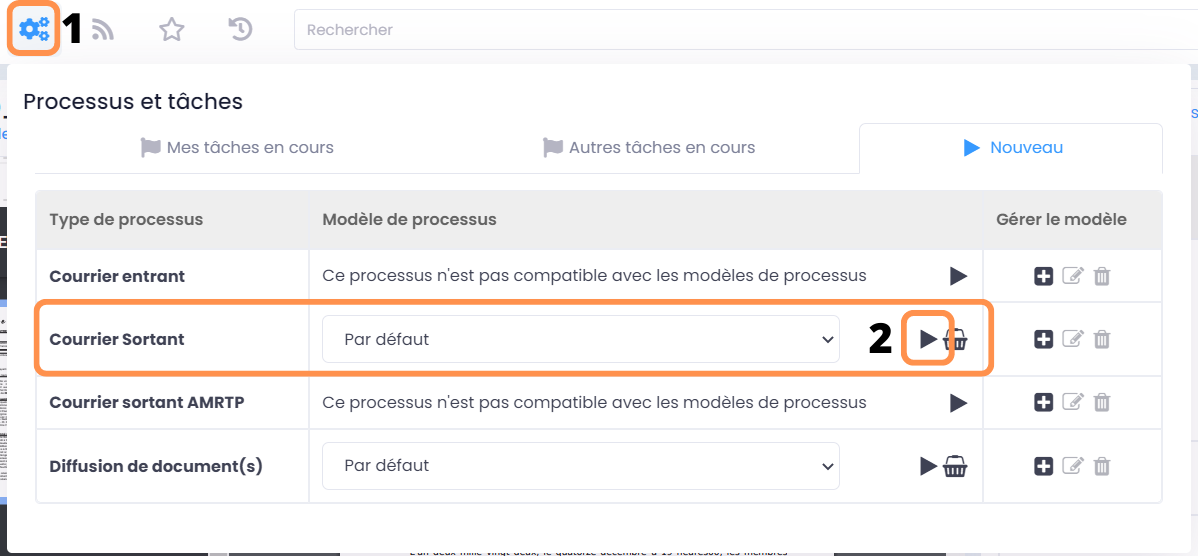
To select a mail management process and start from the shortcut bar (top menu):
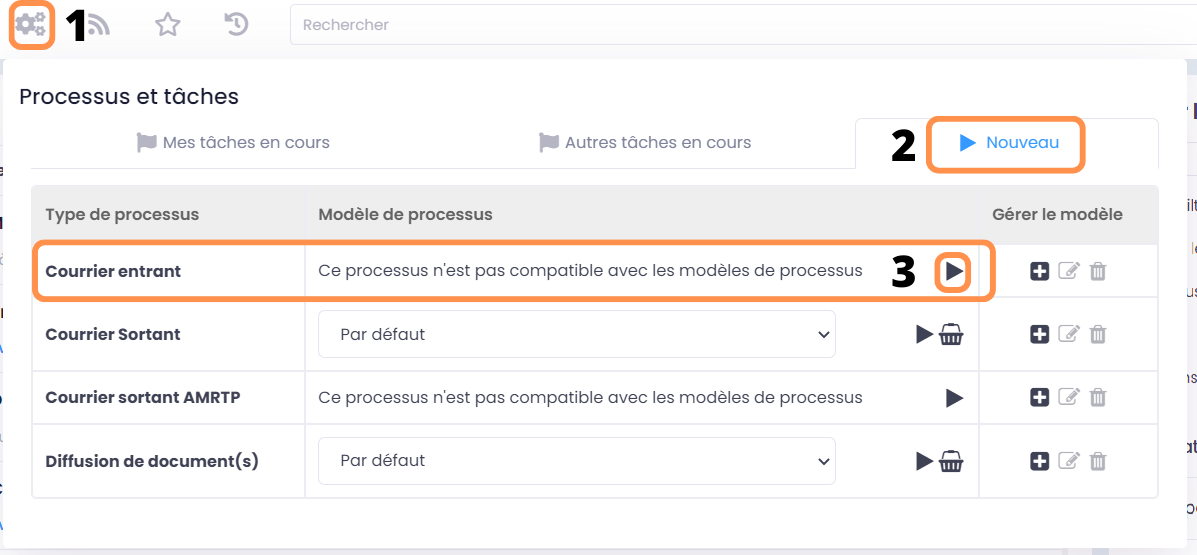
Click on the “Processes and Tasks” icon at the top of the page,
In the “Processes and Tasks” window click on the “New” tab
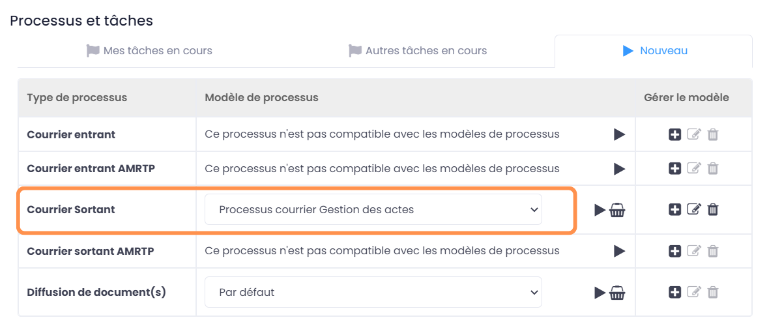
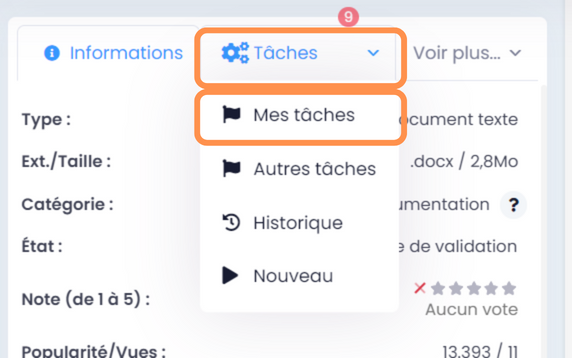
Start a process from a document page
To select a mail management process and start from a document page:
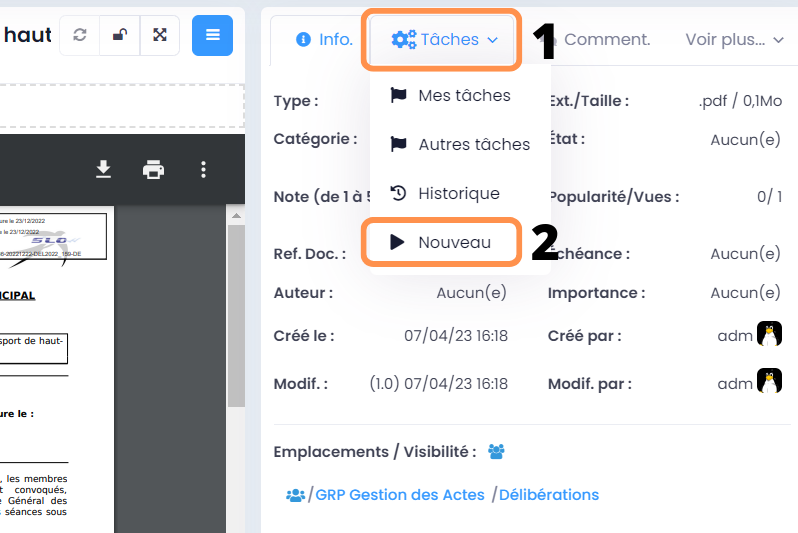
Go to the “Tasks” tab Click on the “Processes and Tasks” icon at the top of the page. Then click on “New”
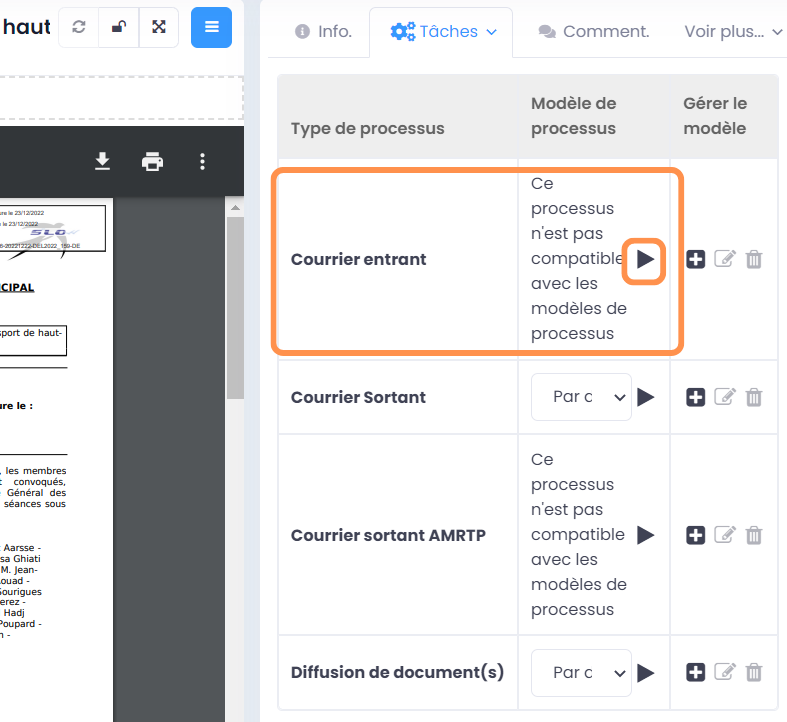
A new tab will appear, select “Courrier entrant” (Incoming Mail) as below:
Start a process from the cart
In case you have several mails for a service, you can start your process via the cart.
Note
Put your mail in the cart
Click on the “cart” icon in the quick access bar (main menu at the top)
Under the list of documents in your cart, click on “New process”.
The list of available processes is displayed: select the “courrier entrant” (incoming) process
Enter the form for sending incoming mail

Once the “courrier entrant” (incoming email) process is selected, the submission form opens and allows you to fill in the various fields and assign the different steps of the process to your employees.
Note
If the incoming mail requires a reply, simply check the YES field in the “Requires a reply” field.
In this case, the incoming mail processing process is finished, the outgoing mail processing is triggered automatically.
Note
The registration number is incremented with each registration.
Note
As soon as the transmission form is launched, the category of the document changes to “courrier entrant” (incoming mail) and the status to “en cours de transmission” (transmitting).
Note
Throughout the processing of the mail, the status, location of the document changes according to the steps.
Start a process from the incoming mail space
You can also simply drag-and-drop to the “To be processed” subspace. This will automatically start the mail processing process.

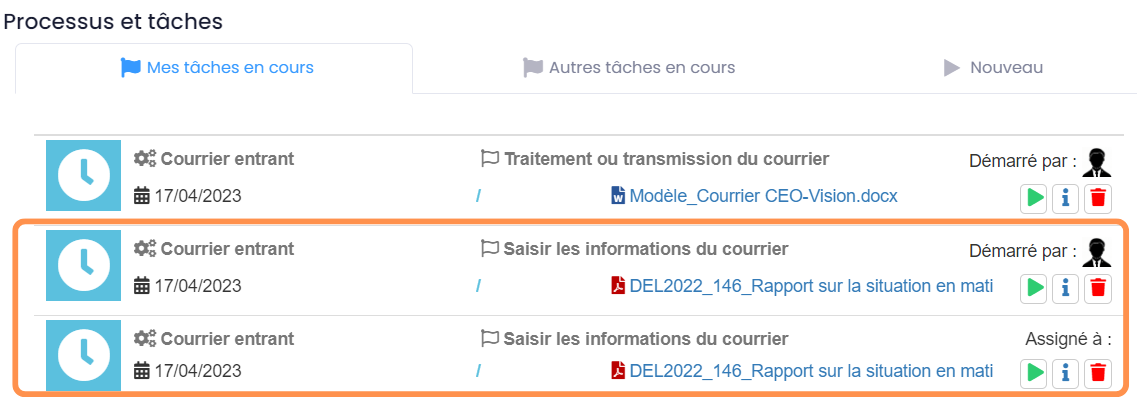
You will then find the processing of this mail in “Processes and Tasks” and in “My Current Tasks”:
How to start an outgoing mail?
The outgoing mail process may be attached to an incoming mail, in which case there is no need to start the process. It is already in the process tray, you can view and process your process via the icon “Processes and Tasks”
Note
The two letters are linked.
Note
Incoming mail is attached to the outgoing mail management form.
In case the outgoing mail process is not attached to the outgoing mail, you can start the process via one of the 4 ways seen above. However, you must select “courrier sortant” (outgoing mail).
Example of one of the 4 ways
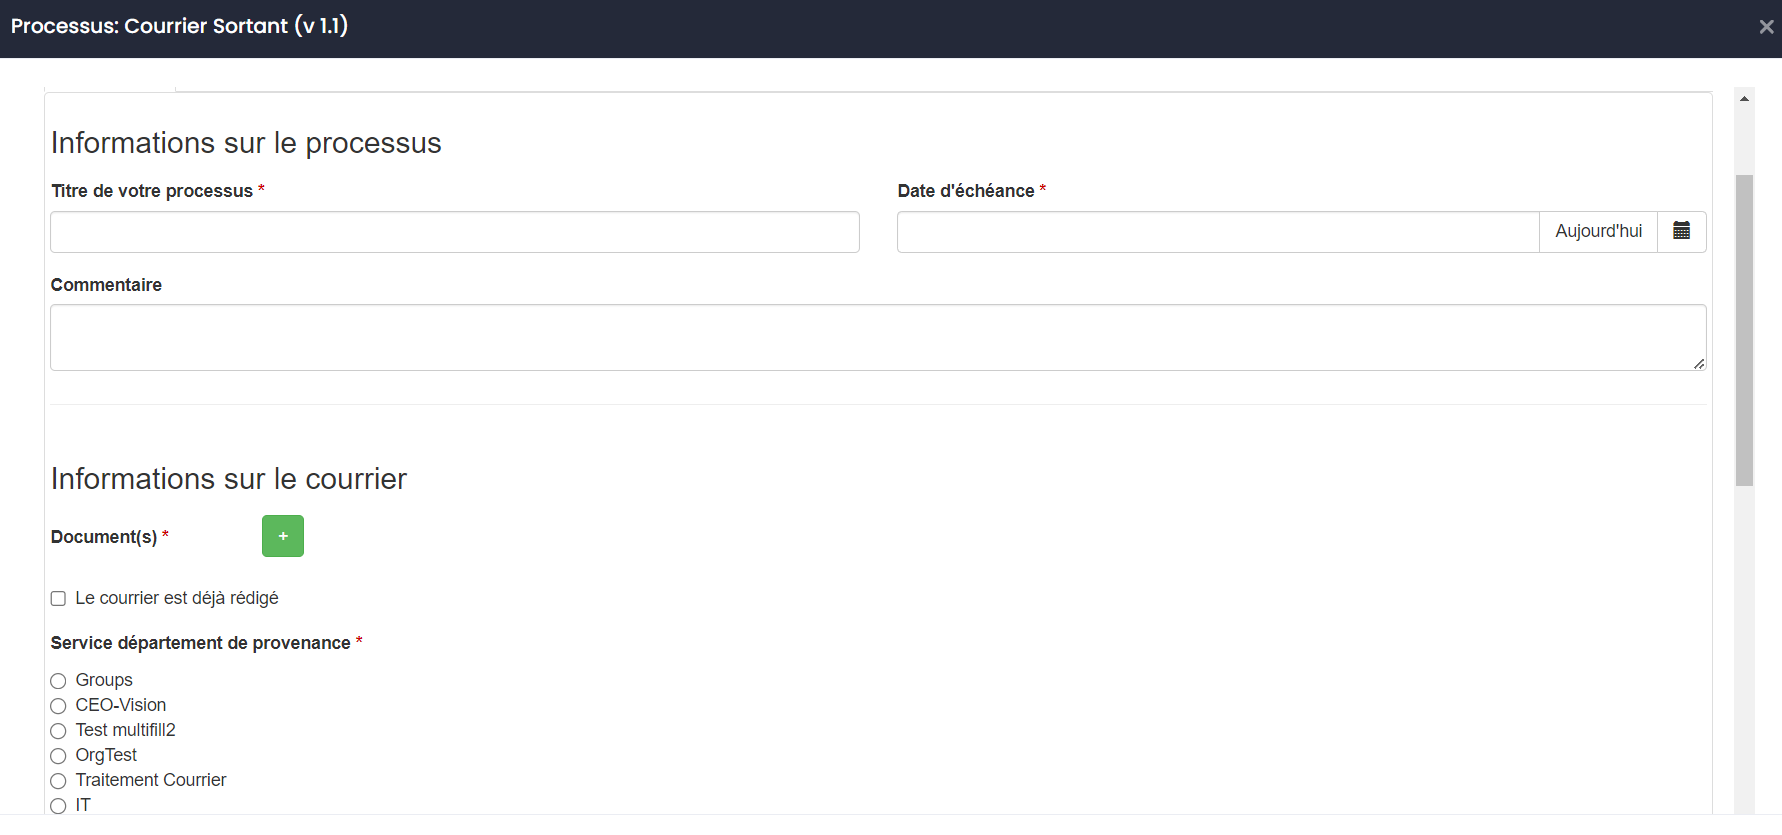
Enter the form for forwarding an outgoing mail
Once the process has started, the outgoing mail form opens and you can fill in the various fields.
Note
You can choose how to load your outgoing mail either from GoFAST or via your PC.
If the mail has already been written, you can check the “Le courrier est déjà rédigé” Mail has already been written box and the writing step is hidden.
Process an outgoing mail via a template
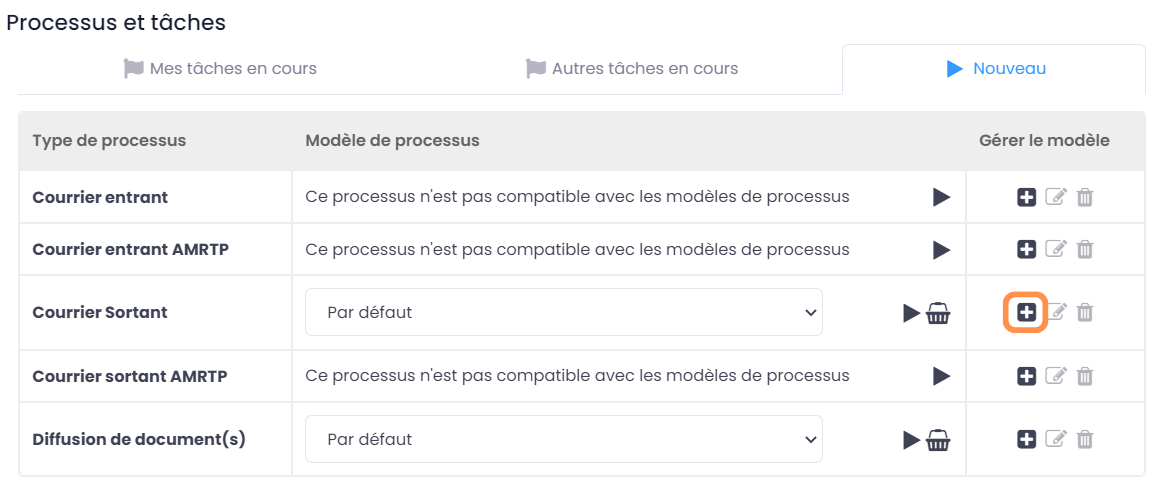
You can also create a template for the mail management process. This speeds up the process and automatically completes the mail processing chain. To do this, go to “Processes and Tasks” and “New”.
Once it is filled, simply select the template created in “Courrier Sortant” (Outgoing Mail).
Once you select, you will notice that the required fields are automatically completed.
List of tasks to be processed and assigned to others
If you want to know more about the tasks, follow this link <https://gofast-docs.readthedocs.io/fr/4.0/docs-gofast-users/doc-gofast-guide-utilisateurs.html#liste-des-taches-a-traiter-et-assignees-aux-autres>`_
Processing your duties
You can process your tasks:
Either from the page of a document: in the information block, tab “Tasks”, you will find the form to complete your task (when you arrive at the document, you will be automatically positioned on this tab if you have a task to process)
Either from the process task tray: click on the “ >” icon to open the form and process the task.
Note
The management process the incoming and outgoing mail module consists of several steps.
GoFAST-Pastell Coupling (signature)
At the general request, we have created a Pastell GoFAST linkage for electronic signature management. Here’s how to use it:
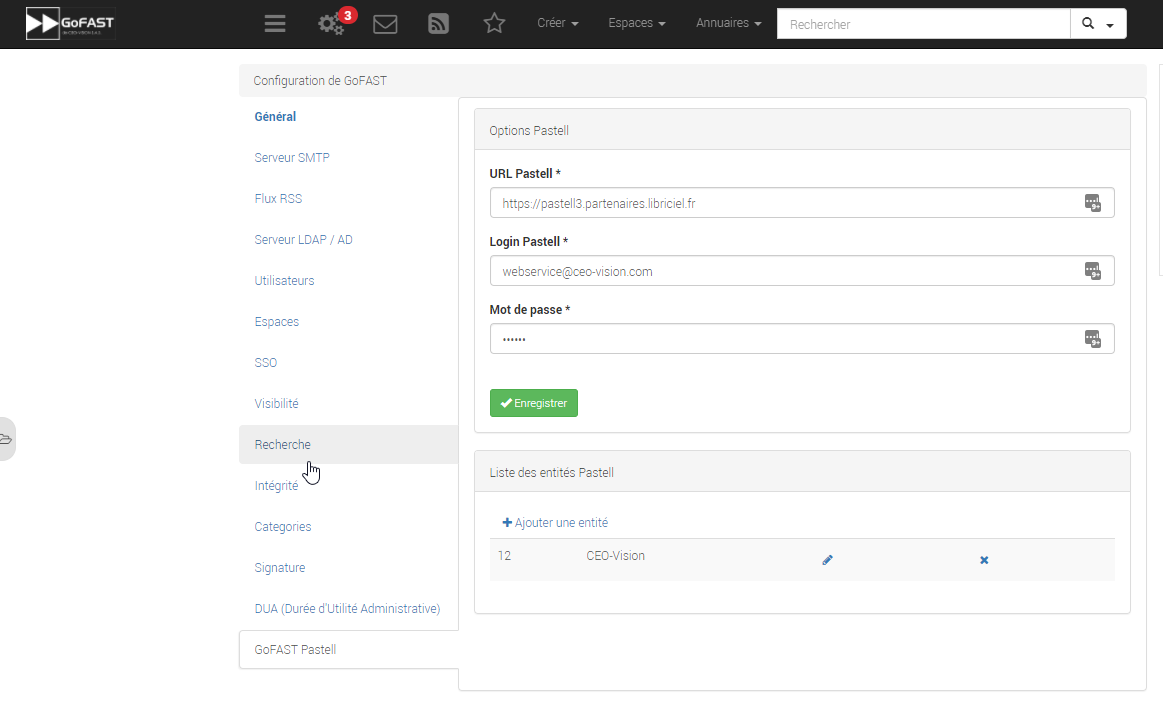
Configuration
In the image below, you can see the configuration of your Pastell in GoFAST (it requires a username, a password, and finally the URL of your Pastell)
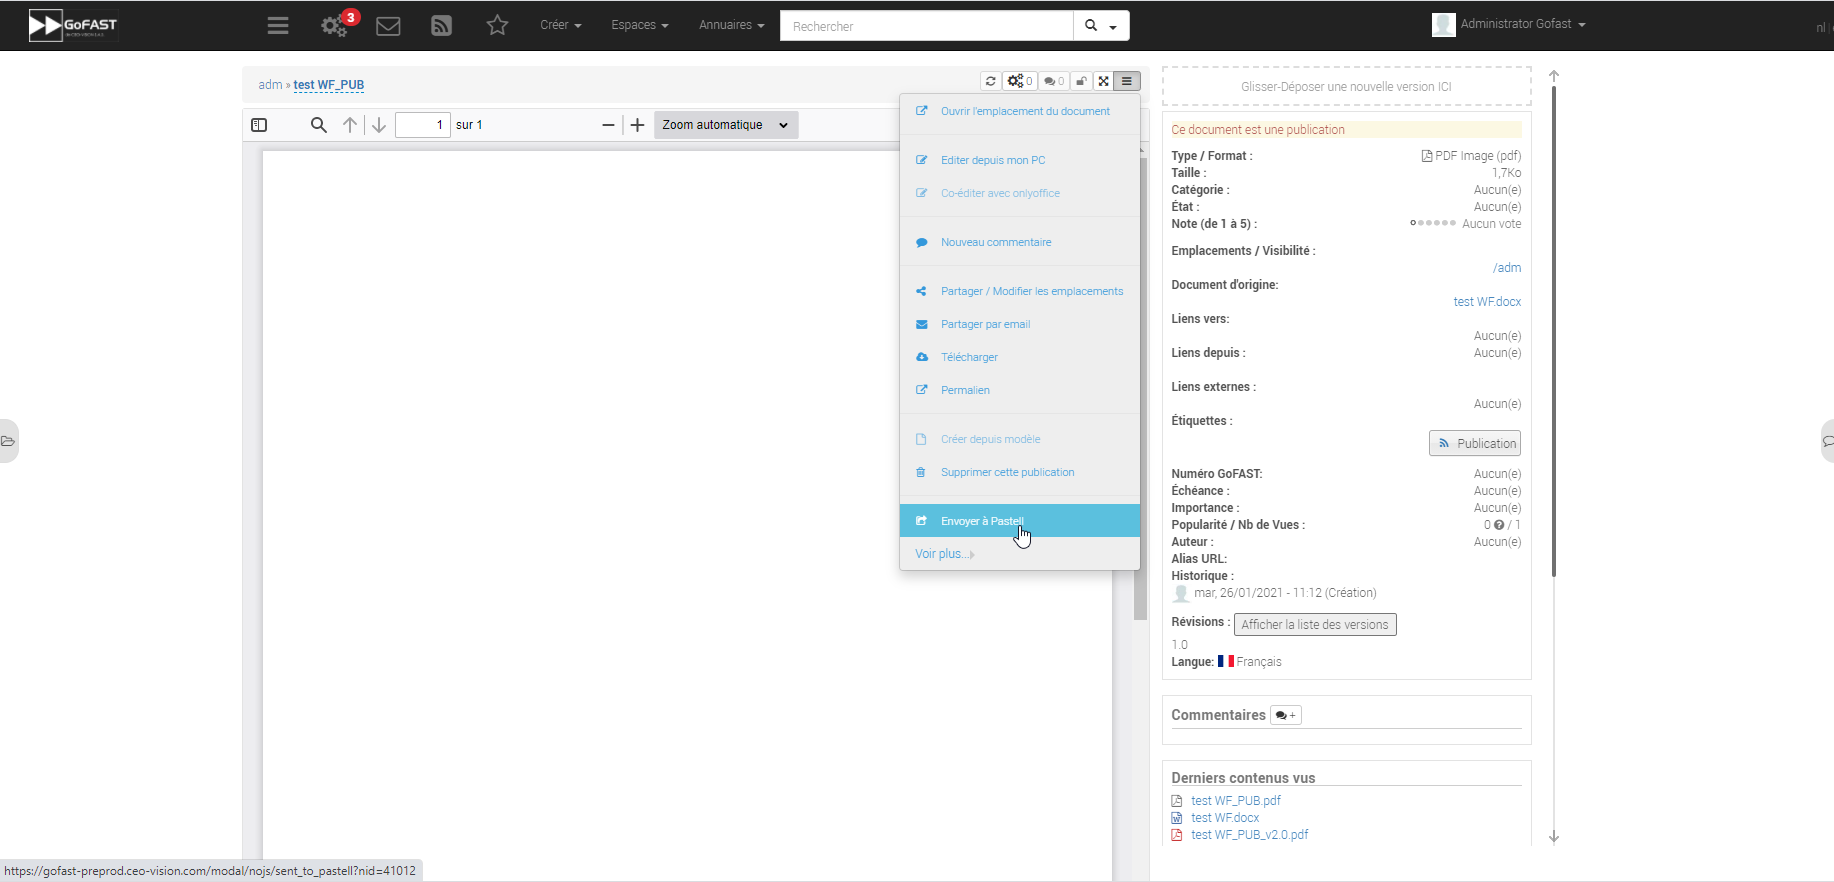
Use
When you arrive at a PDF document, it’s possible to send the document to Pastell for signature via the context menu of the document:
You then arrive at this modal there:
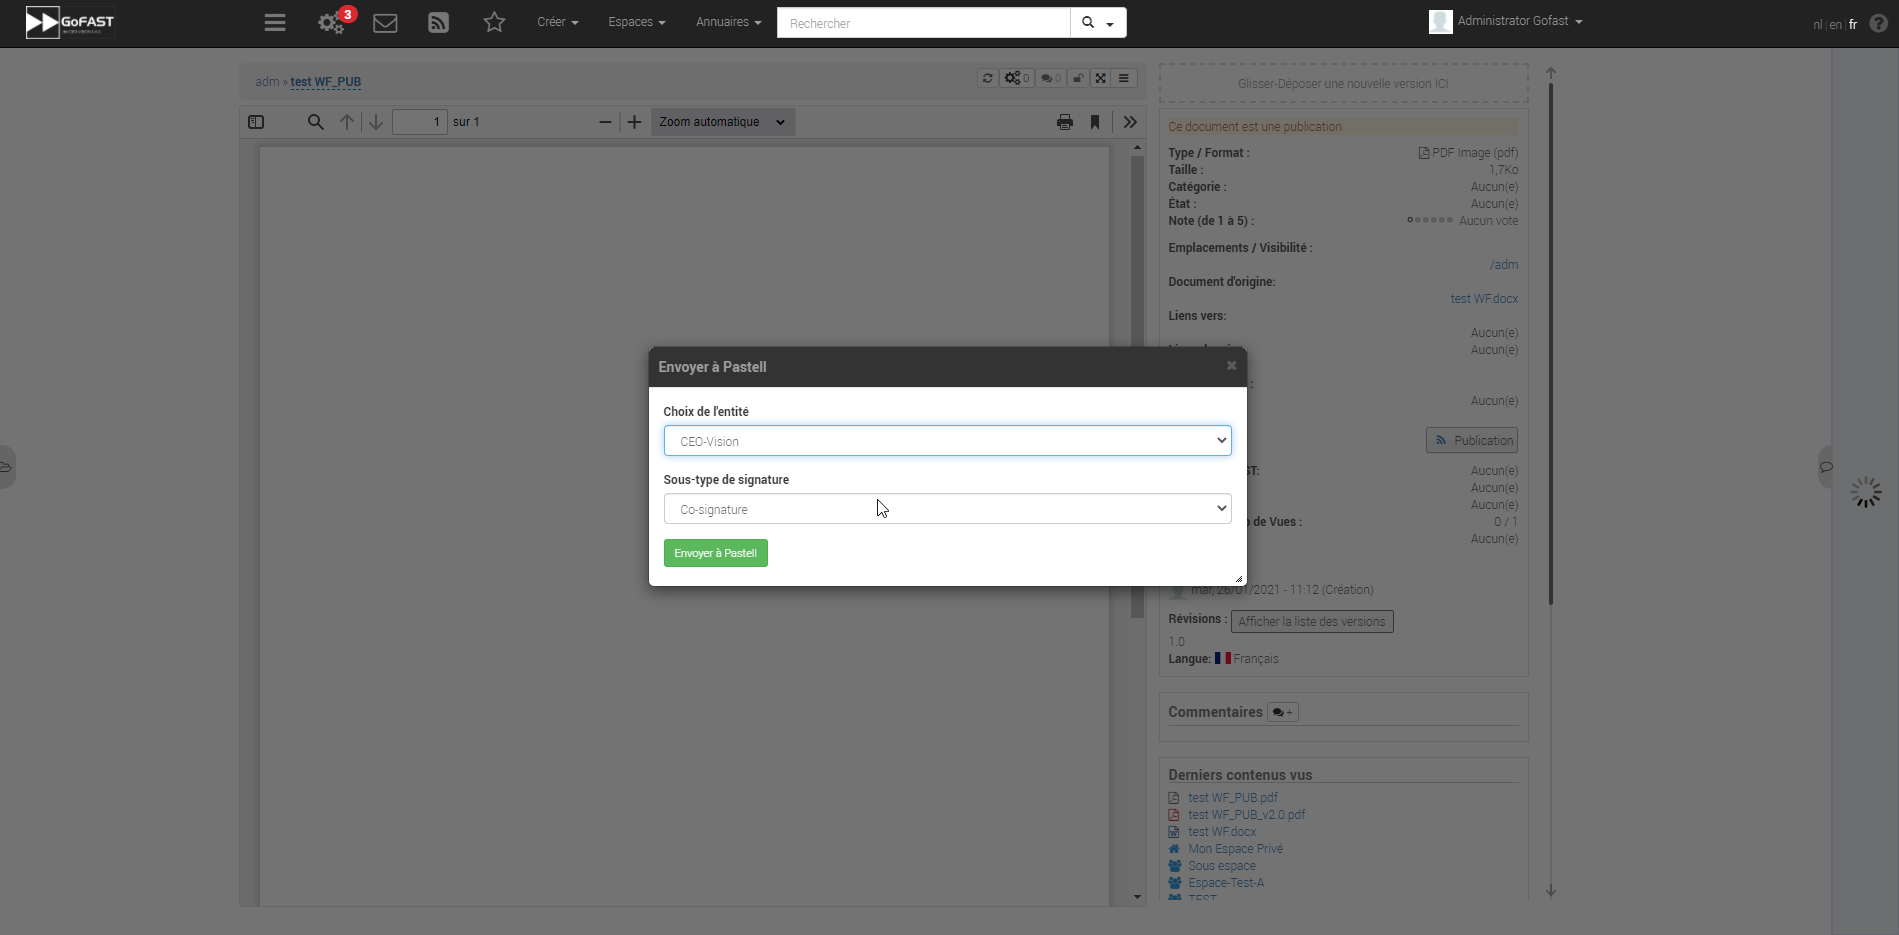
You must then choose the entity to which you belong:
Then the process you decide to use (it depends on the configuration of your Pastell):
you can now send the document to Pastell for signature by clicking on the send button.
The document is then “locked” (non-modifiable metadata).
The status of the Pastell rated document is written as a “Message” when we go to the document:

Once the signing process is completed (approved or rejected), a comment is created with the different steps and their information:

IA module (Mistral)
Introduction
GoFAST’s AI module is available in On-Premise and SaaS modes. It automates document tasks such as file classification, summary generation and the anonymization of sensitive data. Designed to operate securely, without dependence on external cloud services, it ensures data control and compliance with regulatory requirements, while facilitating document management.
Automatic categorization
GoFAST IA automatically suggests a category when a document is created or submitted. This suggestion must be validated manually. When the category appears in italics, this means that it has not yet been validated. To validate them, simply tick the “green check”. After validation, the metadata can still be modified manually. You can restart the categorization process by clicking on the “magic wand” icon.
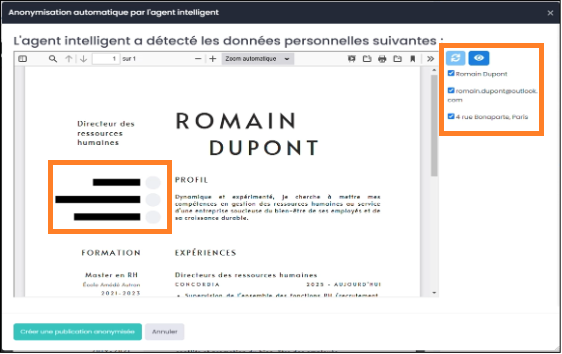
Anonymize a document
In a document, open the burger menu and select “create publication”. Then use the selector to choose “create an anonymous PDF publication”. Or, if the publication is blocked, choose “Anonymize this document” directly. You can choose to keep certain personal data by deselecting them, then update the information using the refresh button. You can hide changes by using the eye icon to better visualize the changes made.
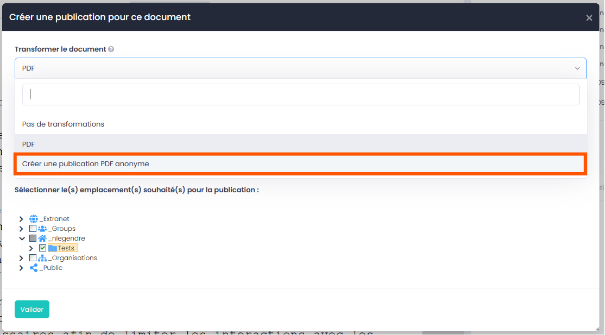
To publish your changes, select “Create an anonymized publication”. You can then choose where you’d like to post your publication.
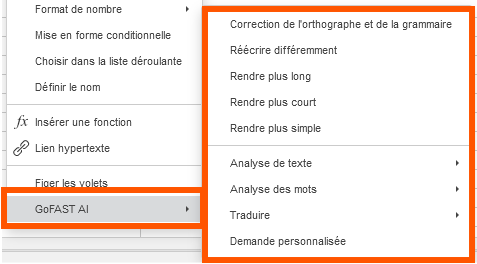
Plugin GoFAST AI dans OnlyOffice
In an OnlyOffice document, after selecting a text, right-click and select “GoFAST AI” :
Generate content from basic ideas.
Reduce or extend text as required.
Instantly translate text into multiple languages.
Automatically correct spelling and grammar.
etc.
It’s also possible to create a customized text from scratch with “Custom Request”.